


Step 2: Creating a lexical model project
Create the new project
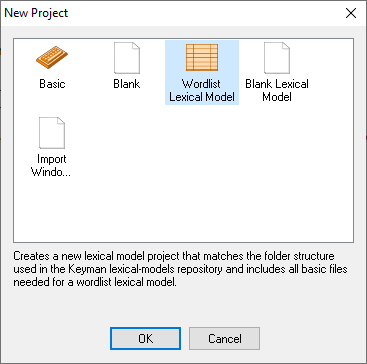
Start Keyman Developer. On the “Welcome” screen, click on . The “New Project” dialog will appear. Select “Wordlist Lexical Model” and press .
Provide required information
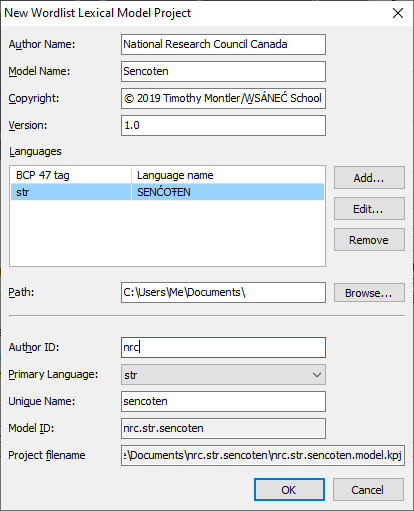
The “New Wordlist Lexical Model Project” dialog will appear.
To make sharing your lexical model easier, a project needs the following information:
- Author Name
- This is either your full name or the organization you're creating a model for. In this example, I am creating a lexical model on behalf of my organization, the National Research Council Canada, so I write that as the author name.
- Model Name
- We recommend the name of the language,
dialect, or community that this model is
intended for. The name must be written in all the Latin letters or Arabic numerals.
In this example, we're creating a language model for SENĆOŦEN, so we use the model name
Sencoten.
Provide auxiliary information
The following information is also required, but most users will use default values.
- Copyright
- Who owns the rights to this model and its data? Typically, you can use the automatically generated default value: © 2026 Your Full Name or Your Organization.
- Version
- If this is the first time you've created a lexical model for you
language, you should leave the version as 1.0. Otherwise,
your version number must conform to the following rules: A version string made of
major revision number.minor revision number.
Determine your language's BCP 47 language tag
Keyman needs to know how to link your model to the appropriate keyboard layout, so that they can both work together. To do this, Keyman utilizes BCP 47 language tags.
To add a language tag, click the button to bring up the “Select BCP 47 Tag” dialog box.
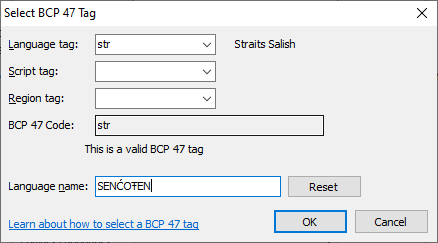
The language subtag
The only required option is the Language subtag, which is an ISO 639-1 or ISO 639-3 code.
ISO 639-1 tags are a two-letter code. ISO 639-3 tags are a three-letter code. First, try to find your language on the list of two-letter ISO 639-1 codes. This Wikipedia page lists all of the two-letter codes.
If you can't find a two-letter code, you'll need to find the closest three-letter code.
You can use Glottolog
to search for your language, and it will give you an appropriate code. In this
example, I searched Glottolog for
“Saanich”
(name of the First Nations that speak SENĆOŦEN) and found str as
the code for all Straits Salish languages.
The next two fields are optional, however, they allow you to be more specific about your language.
The script subtag
The Script subtag allows you to specify the writing system used in your language model. If your language only uses one writing system, leave this blank.
Otherwise, in cases where a language can be written in many different writing systems, you can use this field to choose the ISO 15924 script tag that your lexical model produces.
For example, Plains Cree can either be written in
standard Roman orthography, a Latin derived script,
or it can be written in syllabics, which is part of the
Canadian Aboriginal syllabics family of writing systems. If
I wrote a model that produced syllabics, I would choose Cans, as
that is the ISO 15924 tag for Canadian Aboriginal
syllabics.
The region subtag
The Region tag allows you to specify the region your language or dialect is spoken in. If your language is only spoken in one region, leave this blank.
Otherwise, some languages vary between different regions and countries. In our example, SENĆOŦEN describes the language that covers entire W̱SÁNEĆ region, so this field may be left blank.
However, large languages, like English, Spanish, or French have quite different vocabulary and even different grammatical rules from region to region and country to country. For example, the variety of Spanish spoken in Spain regularly uses words that are uncommon or even vulgar in both in Mexico, and in Latin America. Additionally, regions may have vocabulary that doesn't exist in the other regions where the language is spoken.
If I were creating a lexical model specific to one country, I would use
the ISO 3166-1
alpha-2 country code for the region subtag. For example, ES
for Spain or MX for Mexico.
If I were creating a lexical model just for Latin American Spanish (a group
of countries), I would need to specify Latin America's
UN M49
region code. For Latin America, its code is 419. My lexical
model would not suggest words that are common in Spain, but vulgar in Latin
America, however it would predict words like pupupsas
and chuchitos, which are words that are uncommon in
both Spain and Mexico.
Once you are finished adding the primary language, click to return to the New Lexical Model Project dialog.
The Model ID
Keyman will create a model ID which is how Keyman sorts and organizes different lexical models. If you choose to share your model publicly, the model ID is vital for both people and Keyman to identify and use your lexical model!
Keyman automatically generates a model ID for you, given all the information already filled out. If you're satisfied with the generated model ID, you can skip to the next step.
In this example, my generated model ID is
national_research_council_canada.str.sencoten,
derived from my organization name, the name of the primary language, and my
model name. However, I find the “author ID” part of the generated model ID
excessively long. I changed the author ID to nrc, and the model ID
automatically changes to the much more manageable nrc.str.sencoten.
Double-check the information
Verify that all of the information is correct. Once all of the required information has been filled in and verified, click OK to create the project.
Once we have created the project, we can begin to prepare the data!