Guide: build an in-app keyboard for Android with Keyman Engine
Keyman Engine for Android allows you to use any Keyman touch keyboard in your Android app, or even to create your own
system keyboard app for purchase in the Play Store.
This guide will walk you through the steps for creating your first Android app with Keyman Engine for Android.
If you are not familiar with Android development, you will find the Android Developer online training an invaluable resource, and working through some of their tutorials first will help you with the rest of this guide.
1. Install Free Tools
- Install Keyman Developer 17 or later.
- Install OpenJDK 11.
- Install Android Studio. Android Studio runs on several platforms. Keyman Developer runs on Windows 10 or later.
2. Configure Android Studio
- For Windows users, from Control Panel>System>System Properties>Environment Variables,
create a system variable ANDROID_HOME to the location of your Android SDK. The default installation location is
c:\Users[USER]\AppData\Local\Android\sdk where [USER] is your Windows username. - For Linux users, add the following to ~/.bashrc
export ANDROID_HOME=$HOME/Android/Sdk export PATH=$PATH:$ANDROID_HOME/tools - In a command prompt or terminal, accept all the SDK license agreements
cd c:\Users\[USER]\AppData\Local\Android\sdk\tools\bin
yes | ./sdkmanager.bat --licenses
3. Download Keyman Engine for Android and Build Sample projects
- Download the Keyman for Android SDK and extract the files to a new folder.
The archive includes two sample projects and an Android .aar library file. This guide will use the first example project, KMSample1.
-
If KMSample1.zip exists, extract it to a new folder. Otherwise, the KMSample1 project can be found at Samples/KMSample1
-
In Android Studio, select File>Open and choose the KMSample1 project folder from the previous step.
-
When the project loads, you may be prompted to install Android SDKs; go ahead and follow the prompts to fixup any missing SDK dependencies.
4. Create a keyboard layout
Use Keyman Developer to build a touch layout. The following blog posts walk through some of the development and testing for creating a touch keyboard layout:
- Creating a Touch Keyboard Layout for Amharic with Keyman Developer 13
- Creating A Touch Keyboard Layout For Amharic — The Nitty Gritty
- How to test your keyboard layout with Keyman Developer 13 — touch and desktop
- How to test your touch layout in the Google Chrome mobile emulator
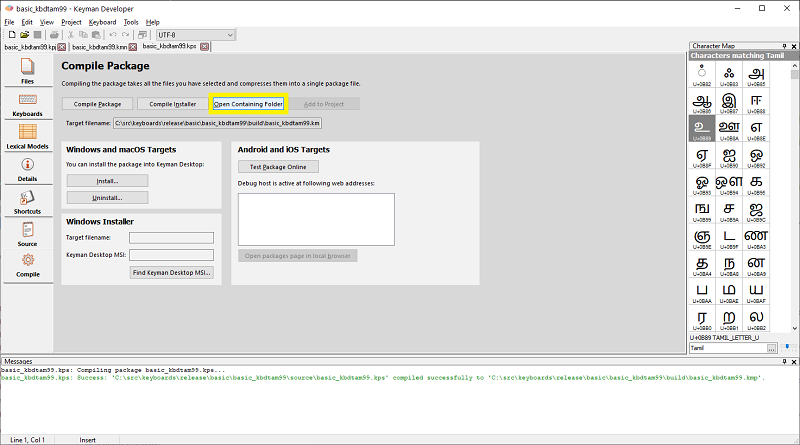
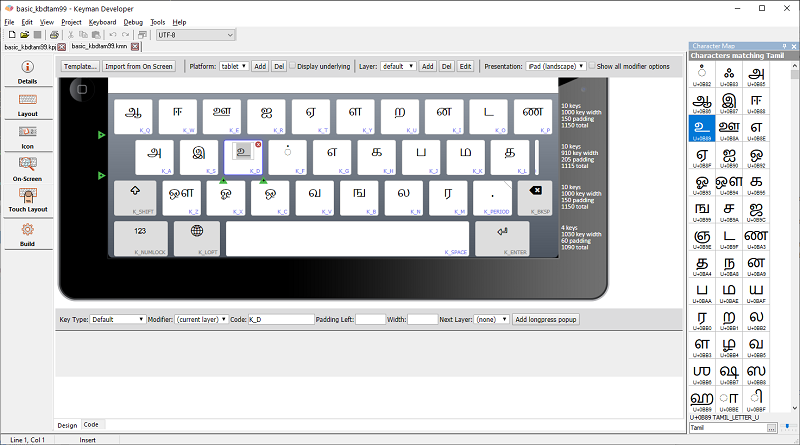
When your keyboard is ready, you should have a compiled keyboard package file. The example below shows the
Tamil 99 Basic touch layout.
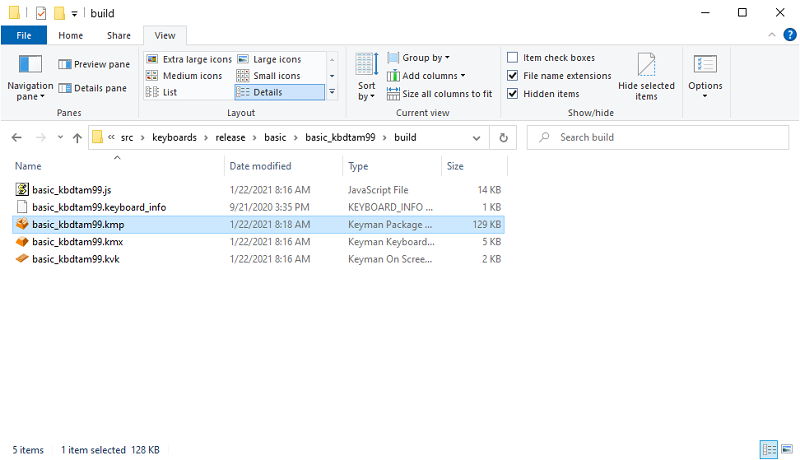
From the package editor, open the containing folder for the keyboard package to find the .kmp file to copy over; its name will be based on your source keyboard name. If your keyboard project settings is configured to output to $PROJECTPATH\build, you may need to navigate up a folder and into the build folder.
5. Add your keyboard package to the project
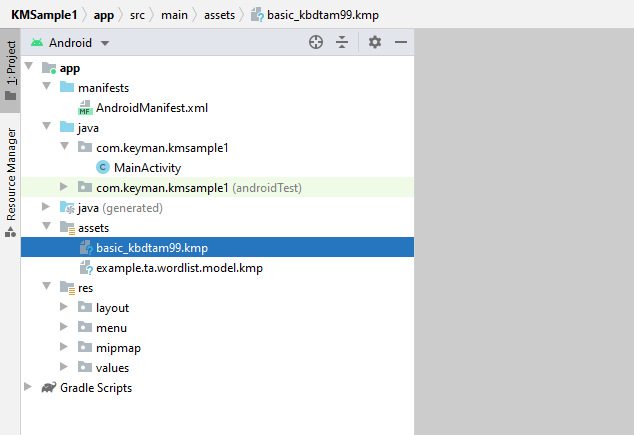
Copy your compiled keyboard package file (in this example basic_kbdtam99.kmp) to the
KMSample1\app\src\main\assets\ folder. If you have an associated dictionary, then copy that to the
same assets folder. This example uses example.ta.wordlist.model.kmp.
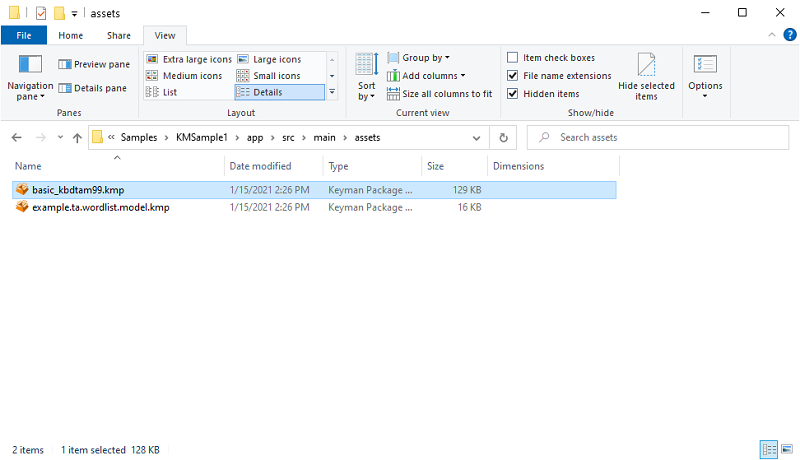
When you switch back into Android Studio, you should see the assets folder with your keyboard and dictionary files:
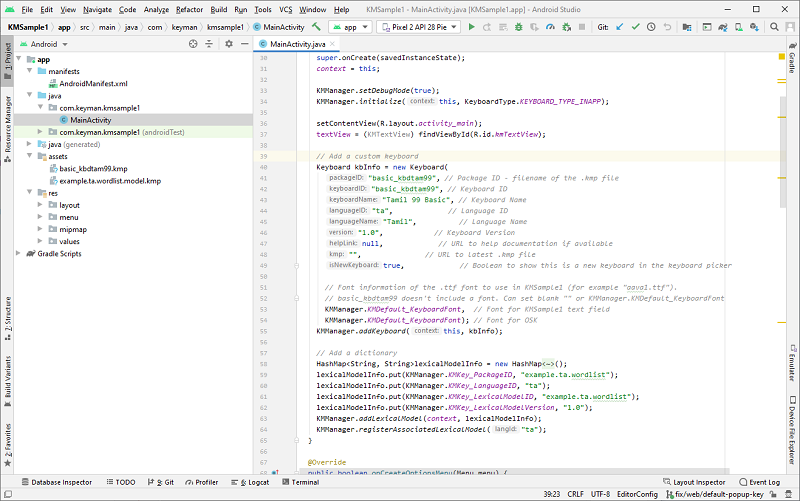
Next, edit MainActivity.onCreate() to add the keyboard (tamil99m) with KMManager.
If your keyboard package is not using a custom font, you can set KMKey_Font to the default font:
    // Add a custom keyboard
    Keyboard kbInfo = new Keyboard(
      "basic_kbdtam99", // Package ID - filename of the .kmp file
      "basic_kbdtam99", // Keyboard ID
      "Tamil 99 Basic", // Keyboard Name
      "ta",             // Language ID
      "Tamil",          // Language Name
      "1.0",            // Keyboard Version
      null,             // URL to help documentation if available
      "",               // URL to latest .kmp file
      true,             // Boolean to show this is a new keyboard in the keyboard picker

      // Font information of the .ttf font to use in KMSample1 (for example "aava1.ttf").
      // basic_kbdtam99 doesn't include a font. Can set blank "" or KMManager.KMDefault_KeyboardFont
      KMManager.KMDefault_KeyboardFont,  // Font for KMSample1 text field
      KMManager.KMDefault_KeyboardFont); // Font for OSK
    KMManager.addKeyboard(this, kbInfo);
If you included a dictionary in the sample app, add and register it with KMManager.
    // Add a dictionary
    HashMap<String, String>lexicalModelInfo = new HashMap<String, String>();
    lexicalModelInfo.put(KMManager.KMKey_PackageID, "example.ta.wordlist");
    lexicalModelInfo.put(KMManager.KMKey_LanguageID, "ta");
    lexicalModelInfo.put(KMManager.KMKey_LexicalModelID, "example.ta.wordlist");
    lexicalModelInfo.put(KMManager.KMKey_LexicalModelVersion, "1.0");
    KMManager.addLexicalModel(context, lexicalModelInfo);
    KMManager.registerAssociatedLexicalModel("ta");
6. Build and run the app
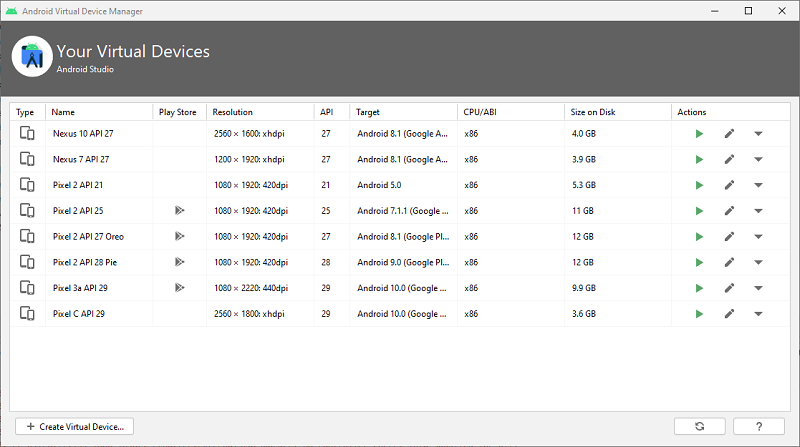
You can run your app on a created Virtual Device, or connect an Android device via USB to your computer to test. In either case, click the green Run button to start the app. The steps below show how to create a new Virtual Device
Click the [Create Virtual Device] button to add a new virtual device, and follow the prompts. Any recent emulated device should work fine. You will be prompted to download additional resources for the emulator when this runs.
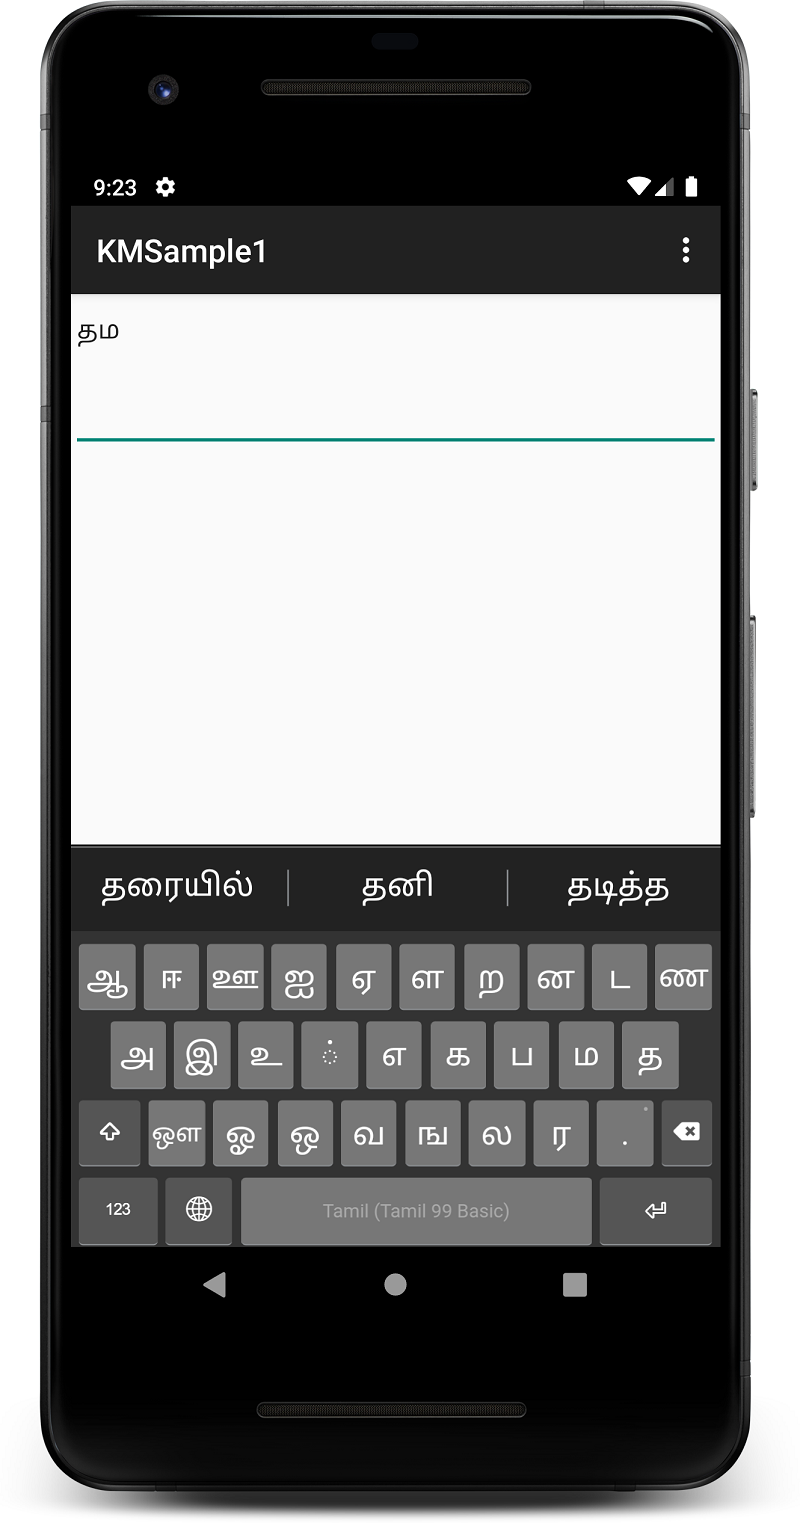
And there you have it: your first Keyman Engine for Android app!


