Keyman Developer Server
Introduction
Keyman Developer Server provides a web-based front-end for testing and sharing keyboards, lexical models and packages.
The primary benefits of Keyman Developer Server are:
- Test keyboards in a browser on your computer, including simulation of mobile devices and touch keyboards
- Test lexical models in a browser on your computer
- Test keyboards, lexical models and packages on mobile devices
- Share keyboards, lexical models and packages to mobile devices and other users
Keyman Developer Server was added in Keyman Developer 15, and replaces the old web Test feature.
Installation and Startup
Windows
Keyman Developer Server is always installed as a part of Keyman Developer.
When you start Keyman Developer, Keyman Developer Server will start in the background.
Note: The first time Keyman Developer Server starts, you may be presented with a warning from your firewall or security software about Node.js Javascript Runtime running from the Keyman Developer folder. This is the Keyman Developer Server host process, and you should choose to allow Keyman Developer Server to communicate at least on your local private network, or as your circumstances dictate.
By default, Keyman Developer Server will run when Keyman Developer is running, and will shutdown when Keyman Developer is closed. However, you can also configure Keyman Developer Server to stay running even after Keyman Developer is closed.
An icon will be displayed in the system notification area in the Taskbar (it may be hidden in the expansion area):
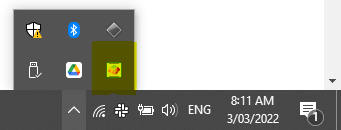
Clicking on the icon opens a menu:
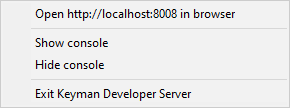
The following menu items are available:
- Open
http://localhost:8008in browser Loads Keyman Developer Server home page in your default browser
- Show console, Hide console
Controls the visibility of the Node console for Keyman Developer Server. You would only need to view the Node console if you were diagnosing issues with Keyman Developer Server
- Exit Keyman Developer Server
Shuts down the Server. The Server can be restarted by closing and re-opening Keyman Developer.
Linux and macOS
Keyman Developer Server is included in the kmcomp.zip standalone distribution. It requires nodeJS 16.0 or later, which should be installed according to your platform's instructions.
On macOS, if you use Homebrew, you can install nodeJS in Terminal:
brew install nodeYou can download the latest kmcomp.zip with the following commands:
mkdir kmcomp
cd kmcomp
curl -L https://keyman.com/go/download/kmcomp -o kmcomp.zip
unzip kmcomp.zip
To start the server, from the kmcomp folder you created earlier, run the following command:
cd server
npm run prod
You can stop the server at any time by pressing Ctrl+C in the Terminal / shell.
Using Keyman Developer Server
Testing a Keyman keyboard in Keyman Developer Server
In Keyman Developer, open a keyboard project, and load the keyboard .kmn file. In the Build tab, click Compile keyboard, then click Test keyboard on web. Finally, click Open in browser to access the keyboard in your local Keyman Developer Server instance.
You will be presented with the default page for Server.
You will need to select your keyboard from the Keyboard menu. The keyboard will be presented and you can test it either by typing using your hardware keyboard, or interacting with the On-Screen Keyboard.

When you make changes to your keyboard and recompile, the keyboard will be reloaded instantly. There is no need to click the Test keyboard on web button again.
Keyman Developer Server remembers the ten most recent keyboards that you have been testing, even after exiting and restarting. This makes it easier to switch between projects in Keyman Developer.
Testing a lexical model in Keyman Developer Server
In Keyman Developer, open a lexical model project, and load the model .model.ts file. In the Build tab, click Compile model, then click Test lexical model. Finally, click Open in browser to access the model in your local Keyman Developer Server instance.
You will be presented with the default page for Server.
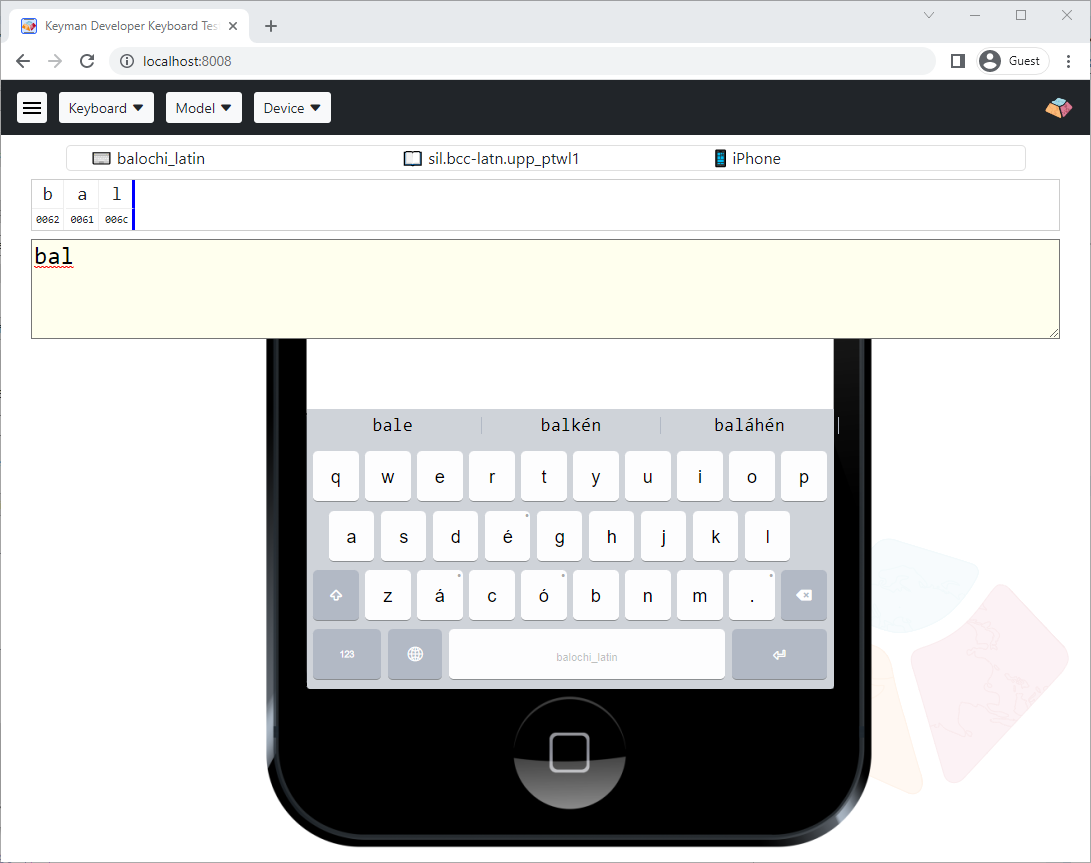
You will need to select a keyboard that works with the model from the Keyboard menu, and also the model you have just started testing from the Model menu. You will have the best results if you select a mobile device to test the model.
When you make changes to your model and recompile, the model will be reloaded instantly. There is no need to click the Test lexical model button again.
Keyman Developer Server remembers the ten most recent lexical models that you have been testing, even after exiting and restarting.
Sharing a package to test from Keyman Developer
In Keyman Developer, open either a keyboard or a lexical mdoel project, and load the .kps file. In the Build tab, click Compile package, then click Test package on web. Finally, click Open in browser to access the package in your local Keyman Developer Server instance.
The package will be available for install from the hamburger menu at the top left of the banner. This is most useful when you access Server from another device, as you can then easily install the package into Keyman on that device without having to worry about copying files around manually.
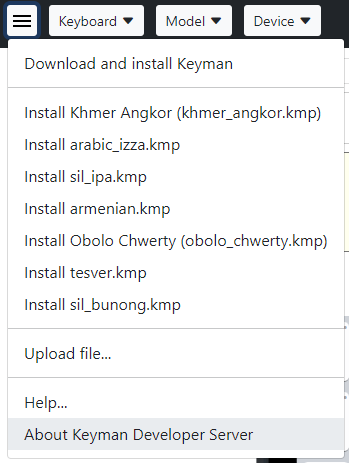
Keyman Developer Server remembers the ten most recent packages that you have been testing, even after exiting and restarting.
Keyman Developer Server interface

This describes the various elements of the Keyman Developer Server web interface.
Banner

On desktop devices, the top banner of Server includes four menus. On a mobile device, the Device menu will not be visible, as the keyboard view will always be the touch keyboard view at the bottom of the screen.
Status Bar

Below the banner, you will find a smaller status bar showing the currently selected keyboard, model, and device.
Character Grid

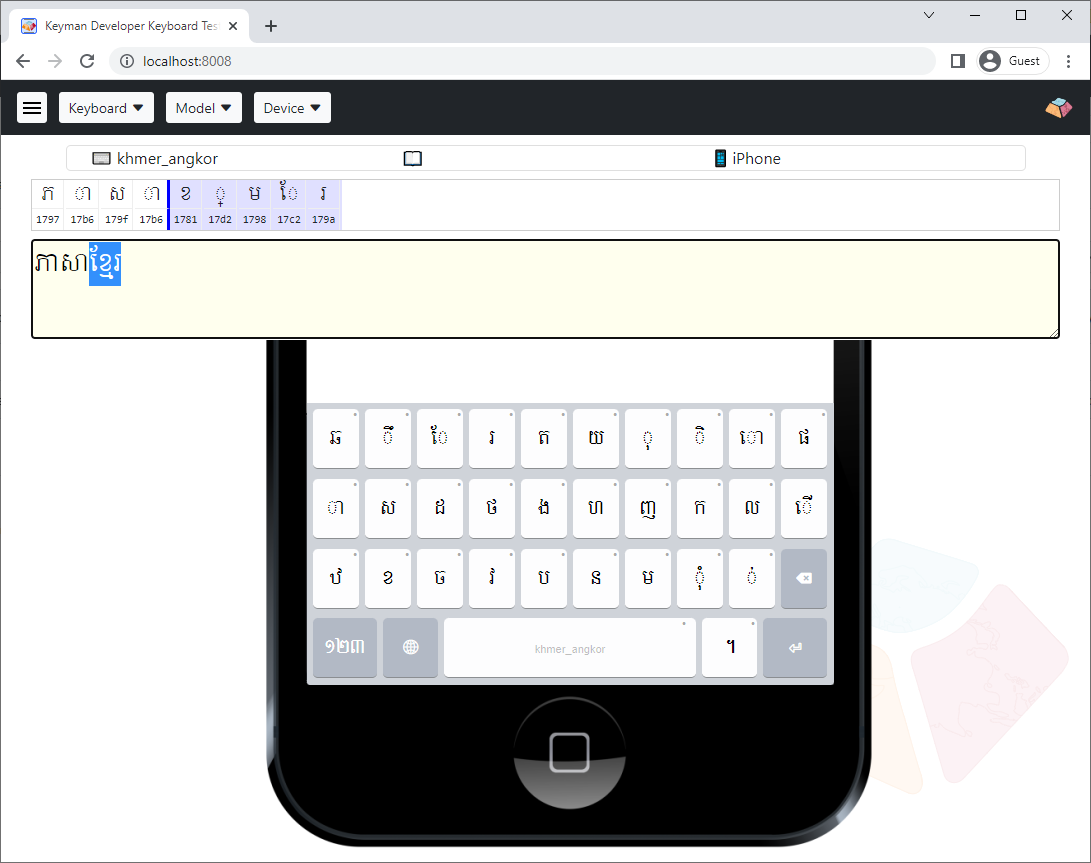
Under this is a character preview grid, which shows you the underlying Unicode values of the characters in your text area. This character grid also shows the current cursor position and highlighted text, so you can easily correlate the shaped characters with their underlying representation in Unicode.
The example image above shows a Khmer keyboard with a sample string saying "Khmer Language". Observe how the character preview grid shows the unshaped underlying characters, how the order of characters stored in the text content may differ from the presentation, and how diacritics and joined marks are indicated with dotted circles.
Text Area

The text area is immediately below this. You can enter text into this text area using your hardware keyboard or using the On-Screen Keyboard.
On-Screen Keyboard
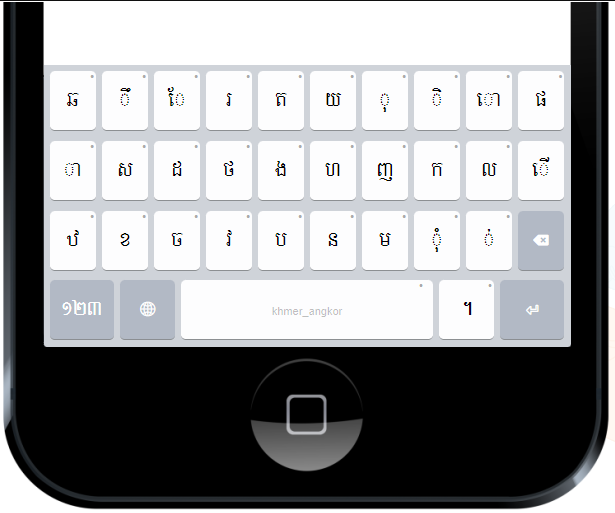
The On-Screen Keyboard, shown directly below, is fully interactive, including support for longpress and other gestures on touch, using your mouse on a desktop device. The layout of the On Screen Keyboard and the device frame are controlled from the Device menu.
Hamburger menu (three horizontal lines)

- Download and install Keyman
This is a shortcut to install Keyman for the current device. It detects the type of device you are viewing this page on, and provides a direct link to the install, whether that be a Windows executable, a Play Store link, an App Store link or other method.
- List of packages
A list of up to ten most recent packages that you have been testing in Keyman Developer. This will open the package in Keyman on the device, which is most useful when testing on a mobile device or sharing the package to other computers.
- Upload file...
Allows you to manually upload any compiled .js keyboard, compiled .model.js lexical model, compiled .kmp file, or .ttf font to be available for testing. This will be most useful when running Server on macOS or Linux, where integration with the Keyman Developer IDE is not available.
You can also drag and drop these same files onto the page.
- Help...
Opens this help site.
- About Keyman Developer Server
Provides information about the version of Keyman Developer Server.
Keyboard menu
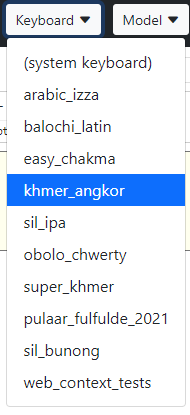
Lists up to ten keyboards that you have been testing most recently from Keyman Developer. Select a keyboard to start testing it.
If you select (system keyboard), this disables testing of Keyman keyboards.
Model menu
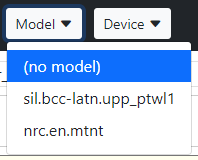
Lists up to ten lexical models that you have been testing most recently from Keyman Developer. Select a model to start testing it. Note that the model/keyboard correlation is controlled by you within this view -- language association is not available in Keyman Developer Server.
While the desktop keyboard views will show predictions if a model is enabled, this is not currently fully supported outside of Keyman Developer Server. You will have better results selecting a touch device in the Device menu for testing lexical models.
If you select (no model), this hides the predictions banner.
Device menu
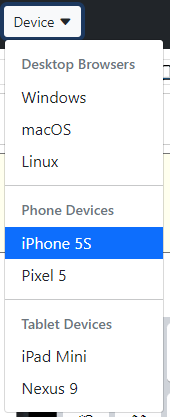
This function is available only from desktop / laptop computers. On mobile phones and tablets, the Device menu is hidden and only the device's default Keyman keyboard form factor is available.
When available, this allows you to simulate use of the devices shown, letting
you test the keyboard and/or model as you would see it and use it on that
device. The device selected changes the presentation of the keyboard, and is
reflected in the platform() statement
context as well.
The devices listed are representative of the various types of platforms that Keyman supports, to allow testing on each of the available form factors.
Making your Keyman Developer Server instance globally available with ngrok
One of the fiddliest parts of testing keyboards and models with mobile devices is transferring the files to your phone or tablet. Keyman Developer Server will make files available on your local network for access, but it can be difficult to configure firewalls and network settings successfully.
To simplify testing, Keyman Developer Server integrates with a free tool called ngrok that provides a public URL to your instance of Keyman Developer Server. This URL is dynamic and can change over time, and is only available while Keyman Developer Server is running. This URL can be accessed from any mobile device that is online, whether or not it is on your local network. This means you can also quickly share keyboards, packages, and models with other users, with a minimum of difficulty.
Warning: While the ngrok service is running, your computer will be sharing your Keyman Developer Server instance to anyone in the world. The Server instance has read-only access to the keyboards that you have loaded into it, but you may wish to turn ngrok support on only when you need it.
ngrok does need a little bit of configuration. These steps will take you through the process on Windows; on macOS and Linux, you will need to download and configure ngrok manually.
-
In Keyman Developer, open Tools | Options, select Server tab, and click Configure Server.... You should be presented with a window similar to this:

-
Tick the box Use ngrok to provide public url for Server
-
If ngrok is available, a version number will be shown to the right of the Download or update ngrok button. Otherwise, click this button to download the latest version.
-
You'll need a free ngrok account, so click the Create free ngrok account... button to open the ngrok website, and follow the steps there to finish the account creation process.
-
After creating the account, you should be presented with an authentication token. You can also access this by clicking the Get token link in the Keyman Developer Server Options dialog box. Paste this token into the Authentication token edit box.
-
Select the most appropriate region for your location, to minimize the latency (delay) when using the ngrok service.
-
Click OK to save changes, and start the ngrok service within Keyman Developer Server.
Once ngrok is configured, you should see an additional Server menu item in Keyman Developer's Tools menu, with three items:
- Open
https://some-url.ngrok.ioin browser Opens the public URL to your current Keyman Developer Server instance in the default browser on your computer.
- Copy URL to clipboard
Copies the public URL to the clipboard so you can share it via email, instant message, or other medium.
- Configure...
Opens the Keyman Developer Server Options dialog box.
Configuring Keyman Developer Server
Keyman Developer Server has a number of configuration options. On Windows, using Keyman Developer is the easiest way to manage these options. Open Tools | Options, select Server tab, and click Configure Server....

Configuration Files
The configuration file config.json is stored in the following locations:
- Windows:
%appdata%\Keyman\Keyman Developer\Server\config.json - Linux:
~/.local/share/Keyman/Keyman Developer/Server/config.json - macOS:
~/Library/Preferences/Keyman/Keyman Developer/Server/config.json
Configuration settings
The value in parentheses is the name of the setting in config.json, where present.
- Default port (
port): specifies the port that Server listens on (http). Defaults to8008. - Leave Server running after closing IDE. This is off by default. If set, Keyman Developer Server will start with Keyman Developer, and run until the Windows session is finished by logging off or shutting down the computer. Keyman Developer Server can be manually closed from the system notification area icon.
- ngrok Settings
- Use ngrok to provide public url for Server (
useNgrok): Defaults tofalse. Set totrueif you want to enable use of ngrok tunnels. - Authentication token (
ngrokToken): the token provided by ngrok for setting up a tunnel. - Region (
ngrokRegion): select the region in which you are located in order to minimize latency through the tunnel.
- Use ngrok to provide public url for Server (
- Show Server console window on start. This is off by default, and would only normally be used for diagnostics or development of Keyman Developer itself.


